Thursday 18th March 2010

Well things are progressing but more slowly than I’d anticipated.  Since the last update I’ve:

  • put the shed walls in place
  • removed the cardboard column form – to find my attempts at preventing air bubbles had failed :(
  • built an internal wooden framework
  • installed the floor and 3 walls
  • secured 2 wooden rails inside the shed for the roof to run on

I’ve run two 4″x2″ rails from front to back to support the roof. These rest on 3″x3″ fence posts which are secured in the ground using post supports (metal spikes that are driven into the ground with a box section on top to receive the post). The roof will have corresponding rails and these will be fitted with castors to allow the roof to run easily. At present the rails only run to the back of the shed, these need to be extended outward to support the roof in the “rolled off” position.

I’ve received delivery of timber today to complete the roof by installing an internal 3″x2″ framework onto which two 4″x2″ rails will be run but have been unable to continue with the build due to the weather. It’s been dry since the project began, but there was some fine rain yesterday and “proper” rain today. Hopefully it’ll be dry enough tomorrow to install the roof which can be clamped in place while I complete the inside of the shed. I’ll look into making the roll-off frame either this weekend or if I can’t do it this weekend it’ll have to be next as I’m back in work on Monday.

No photos today, but I’ll do some when the rain stops.
Friday 12th March 2010

More progress:

  • Finished laying blocks on concrete as the footer
  • Cast the column – that was a big moment

Filling the column form took more concrete than I’d anticipated but I had enough materials to complete it without a trip to the DIY store! A worry of mine was how to compact the concrete within the form to make sure it’s as solid as possible. I used 2 methods. Firstly I used a length of timber to push the concrete down, especially the first couple of shovel fulls, to make sure all the gaps were filled in around the reinforcing rods. Secondly I inserted a right-angled bolt, I think I salvaged it from an old stair gate, into my cordless drill and used the asymmetric motion of the bolt to act as a vibrator to remove air bubbles. I used this against on the framework and also on the top board to effortlessly sink it into the concrete.

All I have to do now is assemble the shed over the column and turn the roof into a roll-off! Easy – I’m not expecting it to be too easy but I’d rather work with a wooden frame than lay concrete blocks!


I bought a bubble level to level the top board and I think that was definitely £1 well spent. Trying to get the column form upright would have been impossible without it. There’s rain forecast today but it should be dry over the next couple of days so hopefully there’ll be an update on Sunday.


more to follow…

Wednesday 10th March 2010

The build is under way!! I’ve been taking it slowly but things are progressing nicely. So far I’ve:

  • dug a hole 600x600x600mm
  • hammered steel rods into the walls of the hole for stability
  • filled the hole with concrete
  • inserted steel rods in the centre of the concrete where the column will be cast
  • started laying foundation blocks
  • started assembling the steel shed

I should be able to cast the column either this evening or in the morning after which I’ll continue with the foundations. I’m only using a single block foundation as there’s no weight in the shed and it’ll be supported internally by a wooden frame.

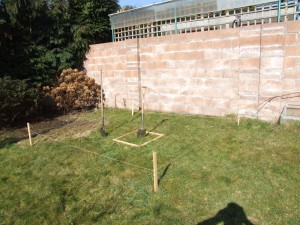
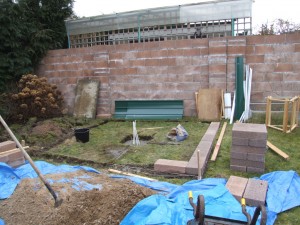
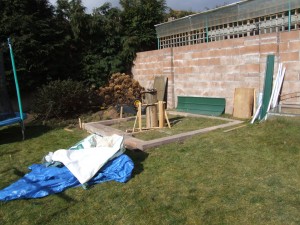
Here’s a before and after shot showing the location of the observatory:

I can’t believe that since dismantling the mount we’ve had the clearest night skies for months. I just have to console myself with the knowledge that it won’t be long until I can take advantage of any gap in the clouds :-D

More to follow…

Monday 1st March 2010

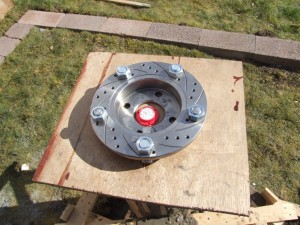
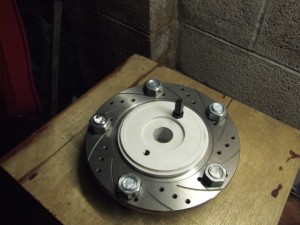
The observatory build starts next Monday!!  Today I’ve found a major flaw in my plan, but I see it as an opportunity to try something different rather than a show stopper. The plan is to fit the flat plate from the top of the tripod into the depression in a brake disk,  weld the pieces together and bolt the whole lot to the top of a concrete pillar.  I had said I’d build a column form but having looked at my warped timbers I decided to buy a 300mm (outside diameter) x 1 metre tube to cast the column and I found some 10mm brake disks in the bargain bucket at Halfords for £10. I bought M20 threaded bar to sink into the column onto which the disk will fit.  Did you spot the flaw? The piece from the top of the tripod is not steel as I expected but is instead a non-ferous alloy of as yet undermined metals. I have an arc welder, my brother has a mig welder but neither of these will weld alloy to steel!

Putting this minor distraction to one side, the column form will be held in place with a wooden cage (I’ve made that) which will sit on wooden beams laid across the base pit.  The pit will be approx 900mm cubed with the column rising from the centre. I’ll level the cage by driving timbers into the ground at angles then screwing them to the cage to hold it upright. This will have to be done on the day of the concrete pour to make sure everything is as perfect as I can get it. When the concrete is set I’ll build my self-assembly steel shed around the column. I’ll build a wooden frame inside the shed extending to the rear to allow the roof to be slid off.  I’ve found a few examples of this being done online but my favourite, and the one I’m using as inspiration is the Linnhe Observatory in Scotland.

Rather than cast a concrete floor I’ll be laying a waterproof membrane and building a raised wooden floor. The observatory will be for the most part remotely operated so there’s no need to build in creature comforts however I will be including storage for all the astro odds and ends that I’ve collected.

I’ll update this as the project progresses …


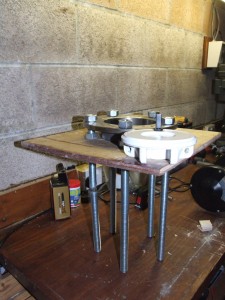
A view of the column top. The wooden plate will be removed after the concrete has set leaving a spanner sized gap for tightening the bolt that will hold the EQ6 in place.

This is the tripod top sitting perfectly in the brake-disk. If only I could weld it there. Plan B may involve drilling in from the sides and bolting the two pieces together. Unless I can find someone with a tig welder?