Friday 12th July

I’ve been waiting for some time to see a Canon DSLR on sale so when I received an email showing a Canon 1100D + lens + memory card more than £100 cheaper than the body only deals I’ve been looking at, well I couldn’t wait any longer and dipped into my savings. WOW what a difference this is going to make to the quality of my astro-images.

Slipping under the radar at a mere £20 ($30) was another addition to my observatory collection, some software called Back-Yard-EOS which it would seem from my first light session is as ground-breaking as the change of camera!

Technical stuff: being an EOS camera it fits into the adapter I was using for the 300D so I literally unplugged the old and plugged in the new. I don’t have mains power for the camera yet so I’ll be running it from the battery which means I now only have 1 cable – USB – to the camera where previously I had 3. The shutter control is through the USB now so no extra shutter release which means my DIY shutter control has been dropped into a box never to be seen again – until I need to recycle the Arduino board for another project ;)

The new camera has a 12 Mega Pixel sensor and 14bit ADC, low noise and low amp-glow. It’s at the cheaper end of the Canon range (maybe Cheapest of the DSLRs?) but seems to have a lot of functionality for the price.

What’s new: live view!! what a difference this makes to focusing and alignment. I can drop a mask over the scope, tweak the focus and I’m ready to go – that would have taken 30 mins previously with me finally declaring “that’s close enough”. Being able to align with a zoomed cross-hair in the centre of the target star means my gotos are very precise – another area where “close enough” would have sufficed previously.

Live view support and zoomed alignment are features of BYE that I’m really liking.

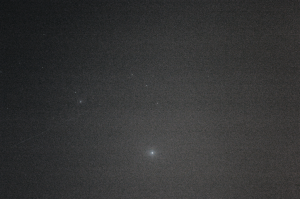
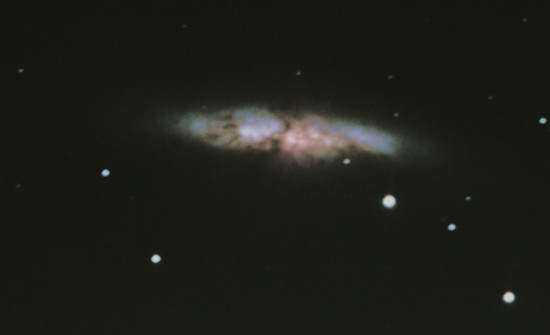
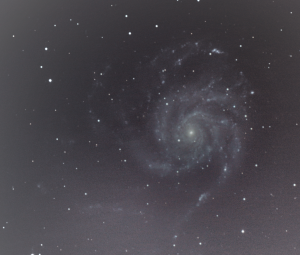
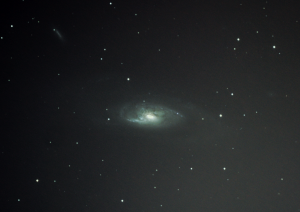
Some images: so here are a couple of first lights, there was a breeze early on which accounts for some egg shaped stars and being the middle of summer my viewing window is reduced to 2 hours from mid-night, so not enough frames to make anything special but a good test of the camera under worst case conditions.

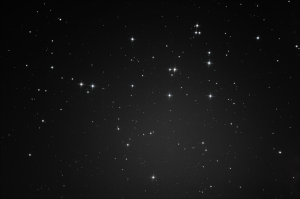
M13-9x60sec-iso1600-small

M13 – The Pegasus Cluster
(9 x 60 seconds)

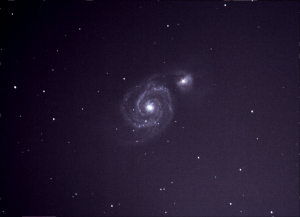
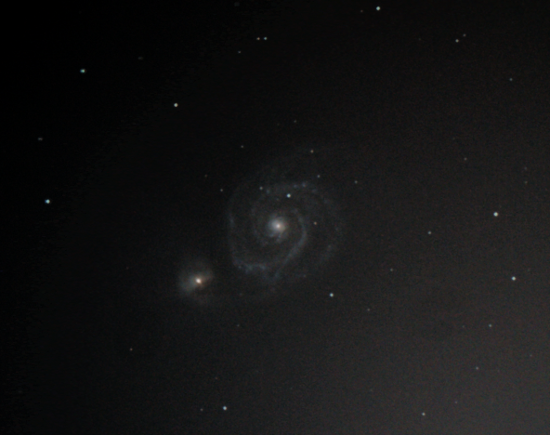
M51-8x240sec-iso1600a-small

M51 – The famous Whirlpool Galaxy in Ursa Major
(8 x 240 seconds)

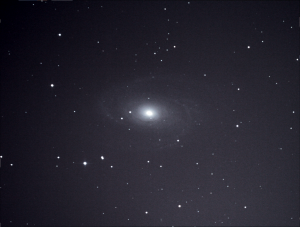
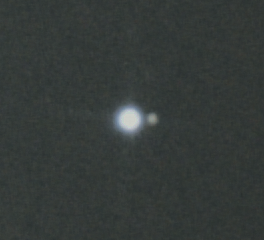
M81-5x240sec-iso1600-small

M81 – Bode’s Galaxy in Ursa Major
(5 x 240 seconds)

Saturday 20th April 2013

It’s been quiet here for a couple of weeks, partly down to the overcast weather but mostly because my observatory laptop stopped working. That shouldn’t be a show stopper, I could use a desktop PC rather than a laptop, but I’m lucky enough to have friends and family willing to part with their old equipment so I’m back in business (nearly).

I have an old Compaq (HP) laptop and spent a rainy weekend a couple of weeks ago installing all the required software and testing. I couldn’t test everything without opening the roof and that would have made me wet, so it didn’t happen. In hindsight I wish I had.

Tonight is clear (ish), certainly clear enough to run some first light tests on the new (old) laptop but after getting everything setup and running the system failed at the final hurdle. The camera control for the Canon tells the camera how many shots to take, what duration, how long to wait before and after each etc and that’s working but the camera goes through the motions without sending images back to the laptop. That’s a show stopper. I could sit down the garden until the early hours trying to resolve the issues or I could pour a pint of speckled hen and update my website – so here I am :)

More bad news on that Comet I had been hoping to take images of. Day by day it’s getting further away and fainter to the point where soon it will be beyond reach. My first slew of the scope this evening, before I found out the camera wasn’t working, was to an area just above the comet. Unfortunately it’s behind my neighbours shed, still too low in the North-Western sky. I think any hope of capturing an image of Panstarrs is slipping away, and with Summer and light evenings coming my opportunities to image will be few and far between.

I’ll see if I can fix the camera problem tomorrow and I have another laptop to fall back on if I can’t make progress with this one. Thanks to Tony and Jono for donating the equipment, I just hope I can do something with it.

Saturday 2nd March 2013

A clear night – and not a school night – woohoo!!

Orions Hidden Jewels

I thought I’d start imaging in the constellation of Orion this evening.  Orion’s belt is a well known string of 3 bright stars which shines high in the winter sky. Just to the left of the left-most star in the belt – Alnitak – is a bright nebula known as the flame nebula. Although it’s a comparatively bright nebula it’s not bright enough to see with the naked eye.
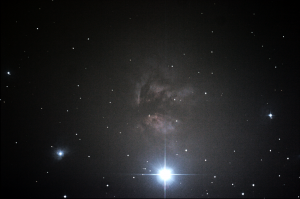
The Flame Nebula

The Flame Nebula in Orion

Alnitak is the bright star at the bottom of the image so really its lying on its side :) The fuzzy “star” to the bottom left in the image is another nebula with the snappy name NGC2023 (NGC  = New General Catalogue – thousands of objects in the night sky have names prefixed with NGC).

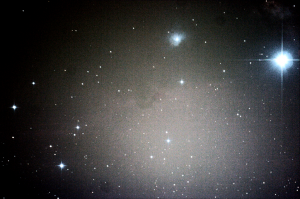
Another famous deepsky object in the area is the Horsehead Nebula which is really a dust cloud that obscures light and happens to be in the rough shape of a horse’s head.  It should be just below NGC2023 in the image, but a modified camera is required to bring this out in its full glory.
The Horsehead Nebula

The Horsehead Nebula in Orion

I did try to capture the Horsehead but it’s not very clear. NGC2023 is top center and Alnitak top right. The Horsehead is a fuzzy dark area below NGC2023 and slightly to the left. The flame nebula is just visible in the top right above Alnitak. Here’s a better image taken by someone with the right equipment: Horsehead Nebula

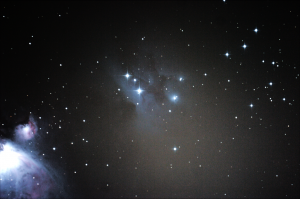
Moving down from the belt is Orion’s sword. This is another string of interesting objects starting with “The Running Man Nebula” (NGC1977) at the top.
The Running Man Nebula

The Running Man Nebula in Orion

The running man is the bluey nebula in the centre of the image. Bottom left is the great Orion nebula with the interesting catalogue names M42 and M43.  The “M” is from the Messier Catalogue rather than the NGC.

It’s 22:10 and the temperature is down to 0.5C.  Luckily the weather conditions, including the moisture in the air, must be just right tonight as the lens hasn’t misted up on the guidescope – yet :)

It’s now 22:15 and I think I spoke too soon.  The guidescope is losing my guide star which usually means it’s starting to cloud over.

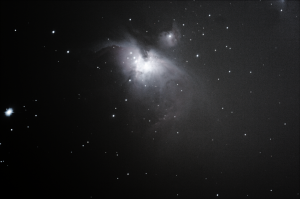
I’ve optimistically set the exposure count to 20 for this image but if the clouds build I’ll call it a night.  Here’s a first draft using 6 of the first 8 images.
M42 The Great Orion Nebula

M42 The Great Orion Nebula

The running man can be seen as a smudge at the top right. M42 is the main bulk of gas and dust that forms this nebula.  A cluster of bright new stars called the trapezium lights the centre of the nebula but it extends over most of the frame of this image. Longer exposures, clearer skies and more careful focusing would all help expose more detail but it is possible to see some of the fainter areas in this image.

The Great Orion Nebula is visible to the naked eye on a clear night as a blurry “star” in the middle of the sword. Using binoculars allows more detail to be seen but not as much as a long exposure camera will :)

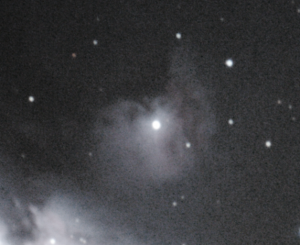
M43, also called De Mairan’s Nebula, is the small semi-circular nebula at the top of M42. A dark dust cloud lies between the two.
M43 De Mairan's Nebula

M43 De Mairan’s Nebula

Ooops, either the clouds are rolling in or the scope is pointing at the neighbours roof! Time to go close the roof on the observatory and finish processing the images I did get.

There are more nebulae within the bounds of the Orion constellation but I’ll have to image these another night.

All images are 2 minute exposures stacked to bring out more detail and enhance contrast. The image names will usually be in the format object-NimagesxNsecs-iso800 for example flamenebula-10x120secs-iso800.png is a stack of 10 x 2minute exposures..

Here’s the final image of M42. Only 8 from 14 usable images so not enough to capture this stunning nebula in all its glory.
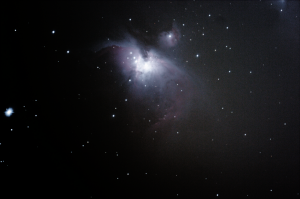
M42, The Great Orion Nebula

M42, The Great Orion Nebula

The central trapezium area is made up of numerous stars but 4 prominent, bright stars give it it’s name.
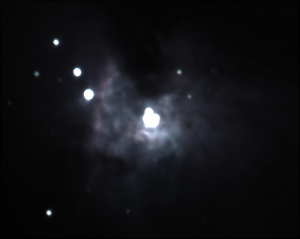
The Trapezium in Orion

The Trapezium in Orion

You can just make out the blobs of 4 stars in the centre of this image but a 2 minute exposure causes these stars to over-expose and blur together. There are other close-up images of the trapezium taken with different cameras elsewhere on this site.

Something that is very obvious to me during processing is the number of dust-doughnuts as they’re called.  These are circular blemishes caused by specs of dust either on the sensor or close to the sensor, such as on a filter or even on the secondary mirror of the scope.


** COMET PANSTARRS IS COMING **

It’s already visible in the southern hemisphere and should be visible from Wales within the next week or so after which it’ll be with us for maybe 3 or 4 weeks.


Friday 15th February 2013

Asteroid

Asteroid

Asteroid

Asteroid 2012-DA14 was on a collision course with Earth, that’s what the loonies were telling us, so I thought it would be a good opportunity to see if I could image the track of this passing lump of rock.

At only 45 meters across this isn’t a big asteroid but being closer than some of our communications satellites it was just bright enough to catch with my telescope and Canon 300D camera.

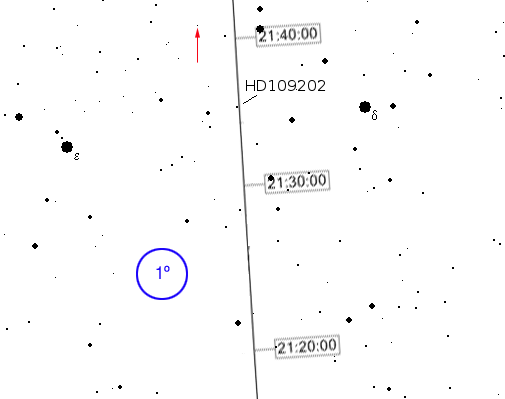
I use Cartes du Ciel as my “star map” these days and this asteroid isn’t in the catalogue so I was starting to think I was going to miss this “near miss” event.  Eventually I found some star charts on the popastro web site and by comparing star positions with those on the sky map I was able to work out roughly where the asteroid would be at a given time (give or take a minute).

I set the computer to take 60 second images with 30 seconds between each to allow enough time for them to download (USB 1 is very slow).  Starting at around 20:30 I ran some practice shots knowing that my best chance was when the asteroid was due to pass star HD109202 at approximately 21:35.

I followed the path of the Asteroid on my sky chart and every 5 minutes or so I ran a set of between 3 and 5 images to see if I could see the track.  After quickly reviewing some of the images while waiting for the telescope to slew to a new position, I wasn’t able to see any sign of the asteroid.  Even more of an issue was the thickening clouds that had started to roll in, this was beginning to look like a lost opportunity but I continued to shoot just in case.

I kept a log of image numbers in a text file so that I’d know which frames where from which batch so if I had to do any heavy processing I’d know which frames were most likely to contain the tell tail streak of an object moving at a different speed to the backdrop of stars.

Imagine my surprise when I copied the images onto my main PC for processing and found that I’d caught at least 1 frame from each of the sets I’d taken except the very last which was too cloudy.

Given the guess work that went into pointing the scope at an empty spot roughly between these 2 points and the guessing at what time the asteroid would reach that imaginary spot I’m very happy with the outcome.

Of course images with trails like this are usually discarded as they’re caused by satellites or planes so I’ll have to make sure these are labelled correctly so I don’t throw them away in the future.

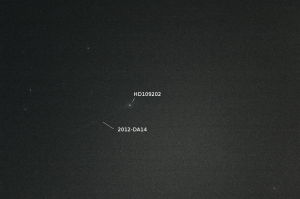
So here it is – 2012-DA14 appearing to originate from HD109202 and travelling down towards the bottom left of the image.

2012-DA14

2012-DA14  taken 2013-02-15 @ 21:35

and here’s an extract from the popastro image that I used to find it:-

Guide Chart

Guide Chart

The apparent magnitude was expected to be greater than 9 at this time but I’ll have to update with more accurate info as I find it.

If you want to measure the apparent velocity of the asteroid you can do it by measuring the track (how far it travelled in 60 seconds) and using the pixel resolution of the Canon 300D and knowing my telescope is 1200mm F/L with an aperture of 252mm. The image has been shrunk form the original 3066 pixels wide to 1024 for the web so you’d need to adjust for that … I say you, because I’ll look it up on the NASA website :)

Here’s another image of it:

2012-DA14 Img18

2012-DA14 Img18

2012-DA14 Img11

Saturday 4th February 2012

M101 28 x 10 minutes

Galaxy

GalaxyGalaxy

Galaxy

Galaxy

Weather report: Brrrrrr!  We’ve had excellent clear skies for the last 3 nights and with the clear skies comes the cold at this time of year.  The observatory has been down to -5°C but we’re in a warm spot here and temperatures on the drive to work have dropped to -9°C! The cold weather from Siberia has been dry which has kept mirrors and lenses mist free and no wind has added to the perfect viewing conditions.

My only complaint is the moon has been very bright which with frames up to 20 minutes each has caused a lot of over-exposure which I’ve had to attempt to process out. Multiple 10 minute exposures have been the norm with few spoiled frames due to the lack of wind.

Aiming away from the moon has limited my targets and concentrated mostly around the Ursa Major area.

One of my favourite Galaxies sits in this area – M81.  Galaxy M81 and it’s close neighbour Galaxy M82 made good targets for the Atik16ic and the Philips webcam but I’ve struggled to get clear consistent images with the Canon.  Here’s my latest effort:

Galaxy M81 16 x 12minutes iso800

M81 16 x 12minutes iso800

Galaxy M82 cropped from the same frames is here:

Galaxy M82 16 x 12minutes iso800

M82 16 x 12minutes iso800

Spiral Galaxy M101 with the recent Super Nova SN-2011fe made an interesting smudge on my test frame so I left the camera running through the night taking 10 minute sub-frames.

Galaxy M101 28 x 10 minutes

M101 28 x 10 minutes

I think this is my best M101 so far :)

M106 is another galaxy that I’ve imaged before and this image is a composite of 8 best frames from a set of 24 again taken through the night.  There’s some faint fuzzies visible and some faint spiral arms outside of the usually imaged inner disk.

Galaxy M106 8 x 15minutes

M106 8 x 15minutes

M51 is another Galaxy, or double Galaxy, that I’ve imaged many times before.  As with all these galaxies any movement of the camera results in loss of detail in the final image. I’m disappointed with this one although there are positives to be taken from it. All the images are processed with Deep Sky Stacker and the resulting 16 bit TIFF files are processed in GIMP which can only handle 8 bit TIFFs. As a result the images published here are not the same as the originals.

Galaxy M51 5 x 5 minutes

M51 5 x 5 minutes

Taking a break from the galaxies I turned the scope to M44 the Beehive Cluster. I’ve been very impressed with the individual star definition in the images I’ve taken this week and I thought a cluster would give me some raw materials to explore this.  As it turned out I have better examples from other images but I’m happy with the way this turned out.

M44 10 x 2 minutes

M44 10 x 2 minutes

Stars:

The bright star in this next image is magnitude 10.3 so I’m guessing the neighbouring star is a little fainter.  I’ve been impressed by the way these stars have remained separate and have noticed on some frames stars overlapping with clear definition between the two.  I’ll have to go back through the frames to find a good example.

Faint Stars

Faint Stars

More stars showing an assortment of sizes and magnitudes but all very clearly defined.

Nice and Round

Nice and Round

The Baader MPCC has made a fantastic difference to the images with round stars across the whole frame.  My only problem has been getting the camera square to the light path with rugby ball stars resulting.  I’ve changed all the bolts on the focuser in an attempt to square things up and I think I may have fixed it :)

Failed: I have some frames from the NGC2237/NGC2246 Rosette Nebula area in Monoceros but the unmodified Canon isn’t able to pick up much nebulosity in the area. This is where a large format CCD would really come into its own. Maybe one day, if my numbers come up on the lottery.

Waiting for more clear skies …


 28th January 2012

I spent some time this afternoon modifying the focuser (putting some shims under 1 side) and changing the bolts from the original to longer bolts.  I knew this would mess up the collimation and the focus but I’ve been pulling the camera to one side with tape in an effort to get the light path straight and I though this would be a more permanent solution.

I’m not sure what the correct method is to square the focuser to the tube but I held a straight edge across the opening of the tube and through the centre line of the camera.  Its crude but it appears to have worked with a few washers helping to make everything square (ish).

Looking forward to the clear skies I started early and quickly collimated and focused and even though the bright stars had halos I was ready to capture some long exposures. It’s now just 19:23 and already the clouds are too thick and there is a threat of rain (or snow) so I’ve had to close the roof – doh!  If it clears up later I may have another go but I think that could be the last “session” in January.

Mount: EQ6 Pro
Telescope: SkyWatcher 250 254mm aperture, 1200mm focal length
Camera: Canon 300D (unmodified)
Mount COntrol: EQMOD (eqascom)
Guide scope: StarChaser 80
Guide camera: Atik 16ic mono
Guide Software: PHD Guiding
Other Software: Cartes Du Ciel
Deep Sky Stacker
GIMP image processing