Sunday 2nd October 2011

A rare few days of autumn sunshine has left the skies clear for a couple of nights and given me a chance to image some old favourites.

In the last few weeks I’ve:

  • Installed the Atik 16ic as the main imaging camera
  • Installed the QHY5 as my guide camera with all the driver issues associated with it!
  • Adjusted the primary collimation on the main scope

It may not sound like much but those few changes have taken time to get right and I’ll need more clear nights before I’m happy with the results.

I’ve found that if I keep my guide camera exposures to 0.5 seconds I don’t get too much movement and I’ve been able to take images as long as 5mins.  After stacking the 5min exposures in DSS (Deep Sky Stacker) I thought the focus was out but it seems there’s just too much movement and the resulting stack looks more blurred than the individual frames.

I may suggest on the EQMOD forum that the software could include a timed shutdown option as I leave the system imaging overnight and hope the scope doesn’t get jammed against anything before I awake and rescue it.  So far I haven’t had any issues but if I could issue a “Park at 4:30am” command I’d feel a lot happier and may even sleep longer :).

Images

So here are a few images from the last 2 or 3 nights. All have been stacked in DSS with curves and levels in Photoshop:

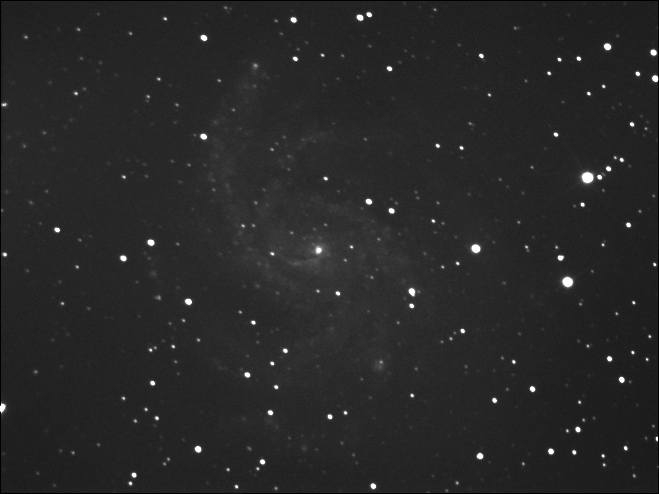
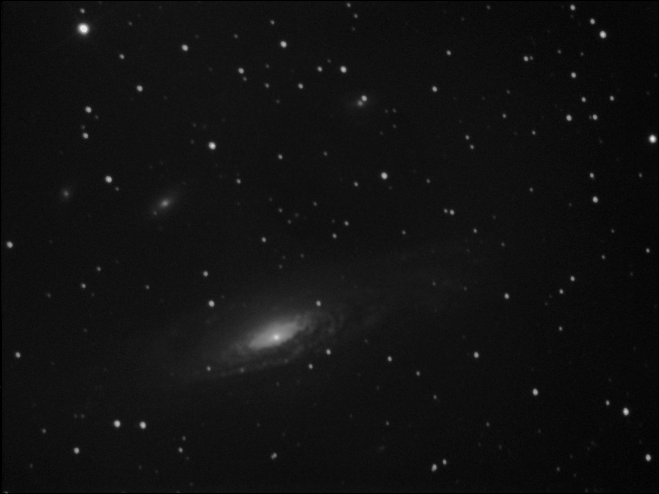
NGC6946 – where I found the supernova a couple of years ago. This is a stack of 20 x 1 minute exposures.

Images from an clear autumn sky

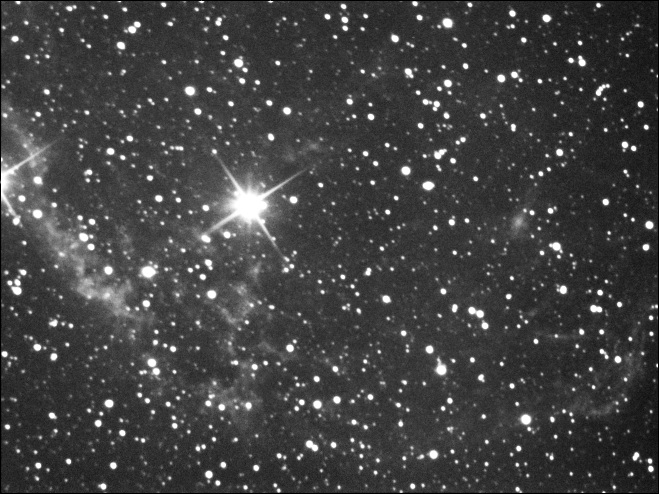
The Crescent Nebula – 24 x 1 minute exposures

Images from an clear autumn sky

I’ve never taken a good image of the crescent, this is probably the best but it remains a tricky object, being just too big for the FOV with the 16ic. Maybe I’ll redo this with the Canon when I next switch the camera’s around.

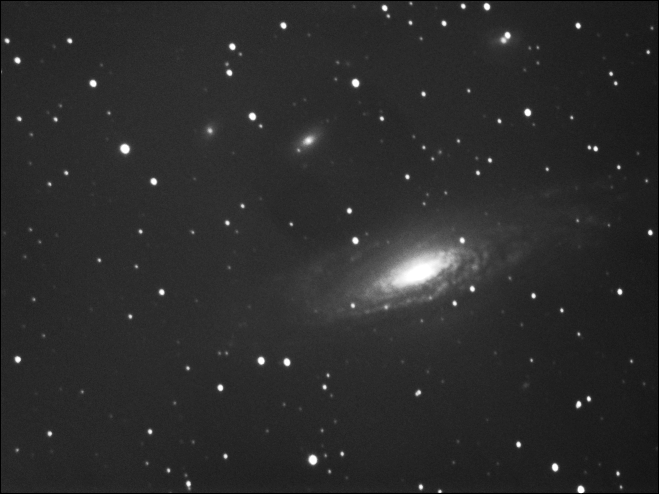
NGC7331 is a spiral galaxy in pegasus. I haven’t done it justice here as I’m sure with the right camera this would be awesome. The galaxy has a number of smaller galaxies in the same FOV making this a nice object to image.

The two images shown here are 23 x 5mins for the top images and 13 x 3mins for the bottom. Dirt on the primary mirror, mist, poor guiding due to fogged up guidescope all contributed to these images not being exactly what I was hoping for.

Images from an clear autumn skyImages from an clear autumn sky

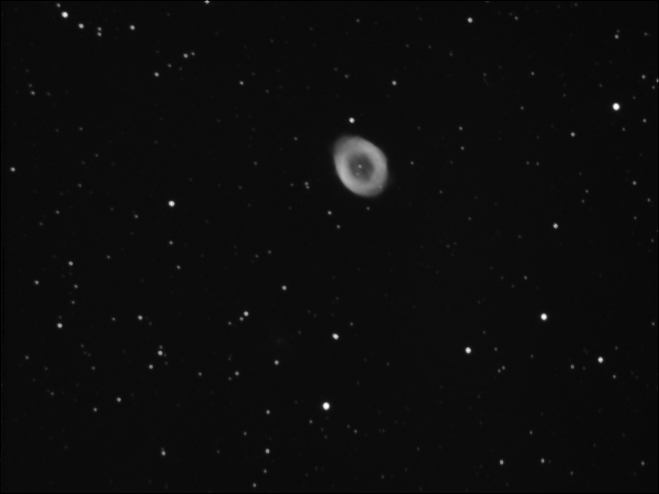
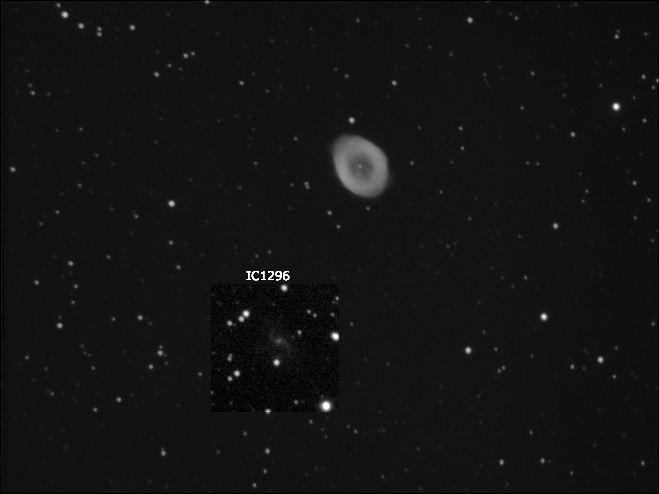
Another object commonly imaged by us amateurs, M57 the Ring Nebula. I’m happy with the sharpness of the stars inside the ring but disappointed with the overall ring which shows more detail in my earlier webcam images than it does with the more sensitive Atik.

The top image is 23 x 30 second exposures and the bottom is the same image with IC1296 highlighted. IC1296 is a 15.5mag galaxy which is overshadowed by its more well known neighbour.

Images from an clear autumn sky

Wednesday 7th September 2011

Nothing to report, it looks like we’ve had the tail end of hurricane Irene blowing across the UK for the last few days so no chance to get back into the observatory.

I’ve been looking through some of my older posts and updated Jan 2008 to include a piece on a supernova in NGC6946 for which my images were used to estimate the date as I had before and after images from the 16th and 24th January. SN2008S is given as official “birth” date of 01-02-2008 but my image from the 24th January clearly shows the SN to be visible.

After looking through the older images I’m tempted to put the Canon away for a while and see if I can take long guided exposures with the Atik16ic. The problem with the Atik is the small CCD offers much smaller field of view than the big CMOS sensor in the Canon which means that even tiny movements will result in egg shaped stars. I’ll have to dig out by other guide cam …. where did I put that?

All I need is a clear night!

Friday 2nd September 2011

I haven’t been on here for a while (that’s an understatement!), I could blame the weather but I think that’s only half the story. After building the observatory I struggled to find the time to use it and seemed to have only sporadic clear spells so I’d spend an evening trimming the focus and alignment then not get another clear night for weeks.

I’ve spent some nights in the observatory since finishing the build last year, but I couldn’t get auto-guiding working even after investing in a dedicated guide scope and haven’t really produced anything worth shouting about.  In the last couple of weeks I think I finally have the guiding fixed and have successfully guided for over 3mins with only slightly eggy stars.  Imaging over 5mins totally over exposes due to the light pollution here in South Wales but I think if I can get enough frames at 3mins I should be able to start producing some good images for the gallery.  My collimation is slightly out and I need to invest in a Baader MPCC (not the first time I’ve said that) as the stars at the edge of the field of view suffer badly from coma.

All the images I have at the moment are waiting for processing so I’ll get them on here as time allows, but for now it’s good to be back :)

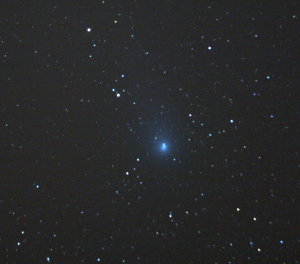
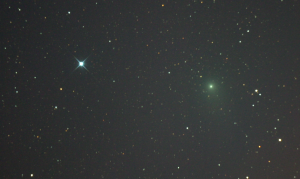
Comet Garradd August 2011

Another view of Comet Garradd Aug 2011

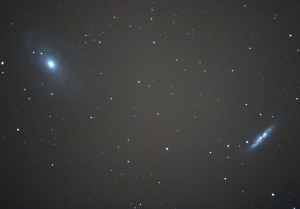
M81 and M82 14x120secs at iso 800

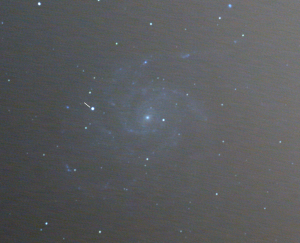
M101 showing Supernova PTF11kly

Not the best images I’ve taken but I’m working on it. The M101 image was taken between clouds to ensure I had an image of the supernova before it fades. Comet Garradd is getting brighter but not expected to peak until early next year. If it makes it to Mag 6 in September, as predicted, it could become the photographers favourite object for a month or so :) Funny how the one image has it green and the other blue, its all in the processing so maybe I need to redo them.

Sunday 25th April 2010

Ok so I lied, I said I’d be back when the rain stopped but haven’t written an update for 5 weeks.

Where shall I start? The project is still not finished but an end is in sight. After the last post, I built the roof frame and managed to lift the roof into place on my own. I figured if the ancient Egyptians could build pyramids I could lift a roof. I’d be lying (again) if I said it was easy. A steel roof 10′ x 10′ with a wooden frame weighs … well lots, and lifting it into place required me placing wooden rails either side and physically lifting the roof past the tipping point to allow it to fall into place. I stopped for a breather after that!

With the roof in place I was able to complete the walls and fascia boards and move onto the rear rail assembly that will support the roof in a “rolled-off” position. Digging 2′ holes for the fence posts was easy enough, trying to hold a post upright and level whilst aligning it with the roof rail (which I couldn’t see) proved to be to too difficult and I eventually built the whole rear assembly upside down on the lawn. After my Herculean efforts with the roof I asked my brother to lend a hand to carry this into place. With a lawn that slopes making everything square and upright was a task. I propped the ends of the main framework on timbers to get it level before fixing the upright fence posts in place. A slight error on my part means one of the posts is not perfectly upright – but close enough. The photo makes it look worse than it is because the steel cladding on the shed runs out slightly where the fascia board pulls the top in. No really – I’m not making excuses.

So where are we – roof in place – rear assembly in place – oh I know what I missed: After getting the roof in place the heavens opened and it rained like I should have built an Ark not an observatory! To my horror the roof leaked. The only reason for buying the steel shed was to make sure the structure was weather proof! Ahhhh. I spent an afternoon with buckets and silicone sealant trying to make running repairs but the silicone washed out but luckily the buckets kept the floor from getting any wetter than it was. The floor wasn’t sealed, it’s made of a type of board that isn’t weather proof and the damp barrier was under it, so when the boards got wet I did worry a little. After several attempts to repair the leaks I got my brother over to help lift the roof off – the once heavy roof was now even heavier as the rails and cross supports where now in place! In hind-sight it was a 4 man job, but by the time we realised that we were past the point of no return. We stripped the roof boards off and re-assembled them, this time with a thick layer of black sticky roof repair goo between each joint and in all the screw holes. On either end we used roofing bolts instead of the provided screws and washers (these are self-tapping bolts with a built in fibre washer). Black goo oozing from the screw holes was dismissed as a necessary evil and the rebuilt structure was manhandled into place, now all I needed was rain to test it.

As luck would have it I didn’t have to wait too long and again AHHHH it leaked! Only in two places, 1 was a screw hole, the other a seam between 2 of the roof sheets. I fixed the screw hole by removing the screw and putting enough black goo over the hole to plug 20 holes, but better safe than sorry. The seam was another issue. The problem was where the sheets overlap. I ran a bead  of goo down the whole length of the seam and screwed through from the inside – pulling the two sheets together with goo squeezing out both sides.

So the roof is on, the rear frame in place – no leaks? still waiting for significant rain to test it – on to the wheels and rails. Running castors on a wooden beam will quickly wear a groove, I decided to buy some steel channel for the castors to run in. I decided 4 castors each side would be enough –  and if not I’d put some more on. Not exactly a scientific approach – but it worked. So how do you screw castors to a rail that’s upside down and weighed down with a roof. I have these clamps that work by pulling on a trigger to close them and pressing a release button to unclamp. by removing one end of the clamp and putting it on the other end it becomes a spreader! I used these to lift and hold the roof with wooden blocks just in case the roof fell while my arms were under it!  The steel was easy to work and I drilled and counter sunk the holes until I broke my counter sink bit, then I used the 20mm bit I’d used on the brake disk as a counter sink – that was fine. Rails in place, wheels in place – paint applied to all exposed steel – now it’s taking shape. Before the wheels and steel rails I was able to haul the roof back a few feet, but now I was able to run it fully off with one hand!

Exterior timber has been painted with wood preserver and the floor covered with wood-oil to waterproof it. I’ve built a wide shelf along the back wall to hold a laptop and any other bits and pieces. I’ve also run an armoured power cable the length of the garden and wired up a consumer unit with RCD and 4 x 13amp power sockets. I have a 6amp circuit for lighting but don’t have a light yet!

So here’s a few photos:


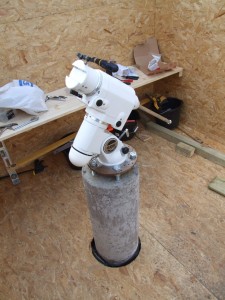
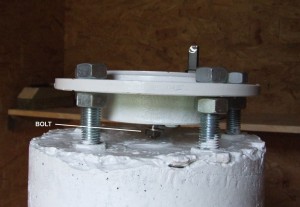
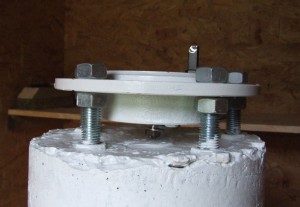
Here’s a shot of the mount in place. I tried it to make sure it pointed north but the clouds came over before nightfall so I couldn’t get a sighting on polaris.  I’m happy there’s enough adjustment to get it aligned, even if the pier alignment is off.

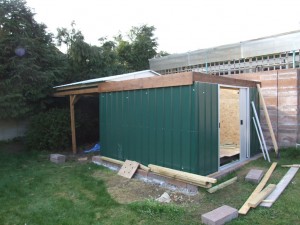
Here’s a shot of the observatory (careful not to call it a shed!) with the roof off. Construction still taking place so it still looks like a building site.

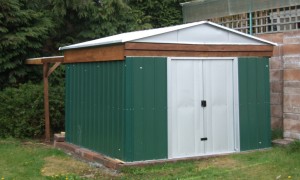
Here’s the latest shot of the outside of the observatory.

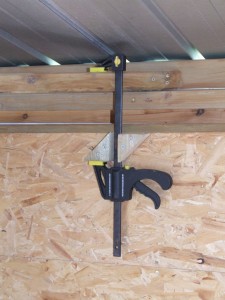
The locking mechanism. Likely to be a temporary solution while I  look for something more permanent. The clamp stops the roof rolling off and also keeps it down. I’ve also added some other clamps and locks to keep it all secure.

Here’s a panorama of the inside of the shed at eye-level. It shows castors, rails, clamps and black goo if you look hard enough :-)


Update 19:05 25-04-2010:

I’m done! I painted the pier and the brake disk, installed a power-line Ethernet adapter to give me network access and fitted a second hasp to the door. I bought 2 padlocks and fitted them as well as some other bits and pieces to help secure the structure.

All that’s left is to find a spanner that will fit under the brake disk to tighten the centre bolt that holds the mount in place. Nothing too serious but without this simple tool I can’t do any more. When done up the bolt is slightly recessed into the brake disk making it difficult to get any type of adjustable spanner (wrench) in there. It’s cloudy tonight so no rush – you can be sure it’ll rain for the next 2 weeks!
Hopefully the next post will be first light at Ty Du Observatory.

Watch this space … ;-)

Thursday 18th March 2010

Well things are progressing but more slowly than I’d anticipated.  Since the last update I’ve:

  • put the shed walls in place
  • removed the cardboard column form – to find my attempts at preventing air bubbles had failed :(
  • built an internal wooden framework
  • installed the floor and 3 walls
  • secured 2 wooden rails inside the shed for the roof to run on

I’ve run two 4″x2″ rails from front to back to support the roof. These rest on 3″x3″ fence posts which are secured in the ground using post supports (metal spikes that are driven into the ground with a box section on top to receive the post). The roof will have corresponding rails and these will be fitted with castors to allow the roof to run easily. At present the rails only run to the back of the shed, these need to be extended outward to support the roof in the “rolled off” position.

I’ve received delivery of timber today to complete the roof by installing an internal 3″x2″ framework onto which two 4″x2″ rails will be run but have been unable to continue with the build due to the weather. It’s been dry since the project began, but there was some fine rain yesterday and “proper” rain today. Hopefully it’ll be dry enough tomorrow to install the roof which can be clamped in place while I complete the inside of the shed. I’ll look into making the roll-off frame either this weekend or if I can’t do it this weekend it’ll have to be next as I’m back in work on Monday.

No photos today, but I’ll do some when the rain stops.