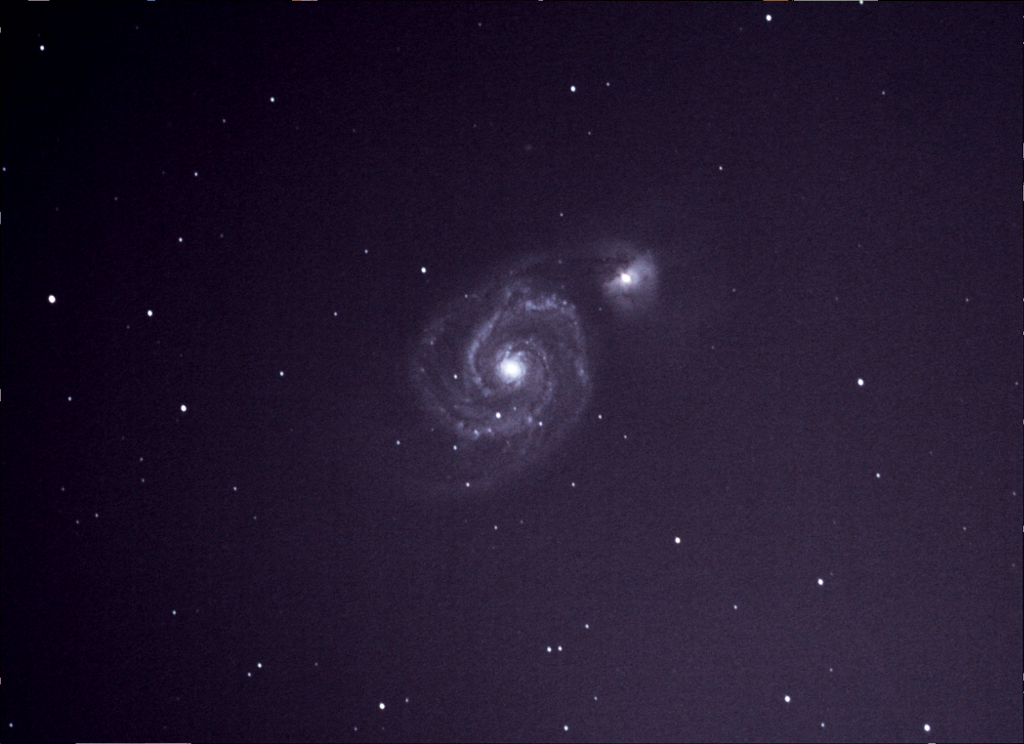
A clear night – and not a school night – woohoo!!
Orions Hidden Jewels
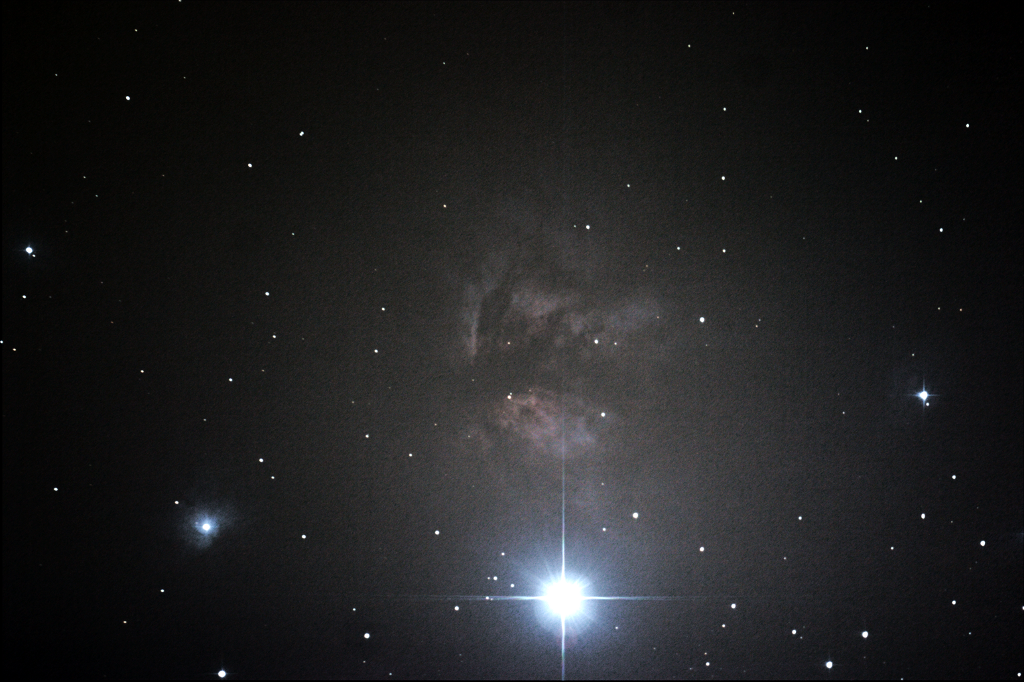
I thought I’d start imaging in the constellation of Orion this evening. Orion’s belt is a well known string of 3 bright stars which shines high in the winter sky. Just to the left of the left-most star in the belt – Alnitak – is a bright nebula known as the flame nebula. Although it’s a comparatively bright nebula it’s not bright enough to see with the naked eye.
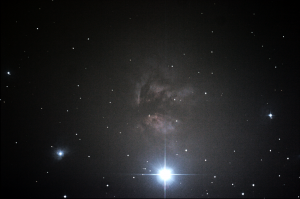
The Flame Nebula in Orion
Alnitak is the bright star at the bottom of the image so really its lying on its side  The fuzzy “star” to the bottom left in the image is another nebula with the snappy name NGC2023 (NGC = New General Catalogue – thousands of objects in the night sky have names prefixed with NGC).
Another famous deepsky object in the area is the Horsehead Nebula which is really a dust cloud that obscures light and happens to be in the rough shape of a horse’s head. It should be just below NGC2023 in the image, but a modified camera is required to bring this out in its full glory.

The Horsehead Nebula in Orion
I did try to capture the Horsehead but it’s not very clear. NGC2023 is top center and Alnitak top right. The Horsehead is a fuzzy dark area below NGC2023 and slightly to the left. The flame nebula is just visible in the top right above Alnitak. Here’s a better image taken by someone with the right equipment: Horsehead Nebula
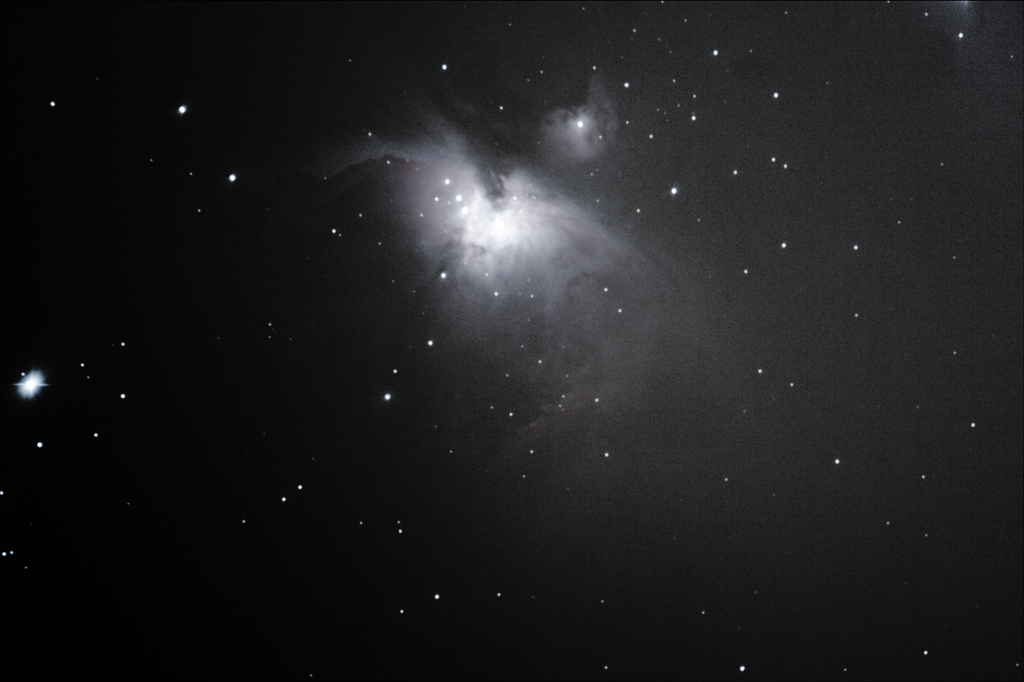
Moving down from the belt is Orion’s sword. This is another string of interesting objects starting with “The Running Man Nebula” (NGC1977) at the top.
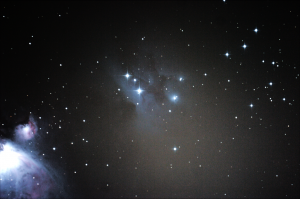
The Running Man Nebula in Orion
The running man is the bluey nebula in the centre of the image. Bottom left is the great Orion nebula with the interesting catalogue names M42 and M43. The “M” is from the Messier Catalogue rather than the NGC.
It’s 22:10 and the temperature is down to 0.5C. Luckily the weather conditions, including the moisture in the air, must be just right tonight as the lens hasn’t misted up on the guidescope – yet
It’s now 22:15 and I think I spoke too soon. The guidescope is losing my guide star which usually means it’s starting to cloud over.
I’ve optimistically set the exposure count to 20 for this image but if the clouds build I’ll call it a night. Here’s a first draft using 6 of the first 8 images.
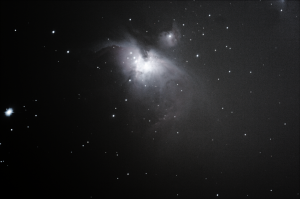
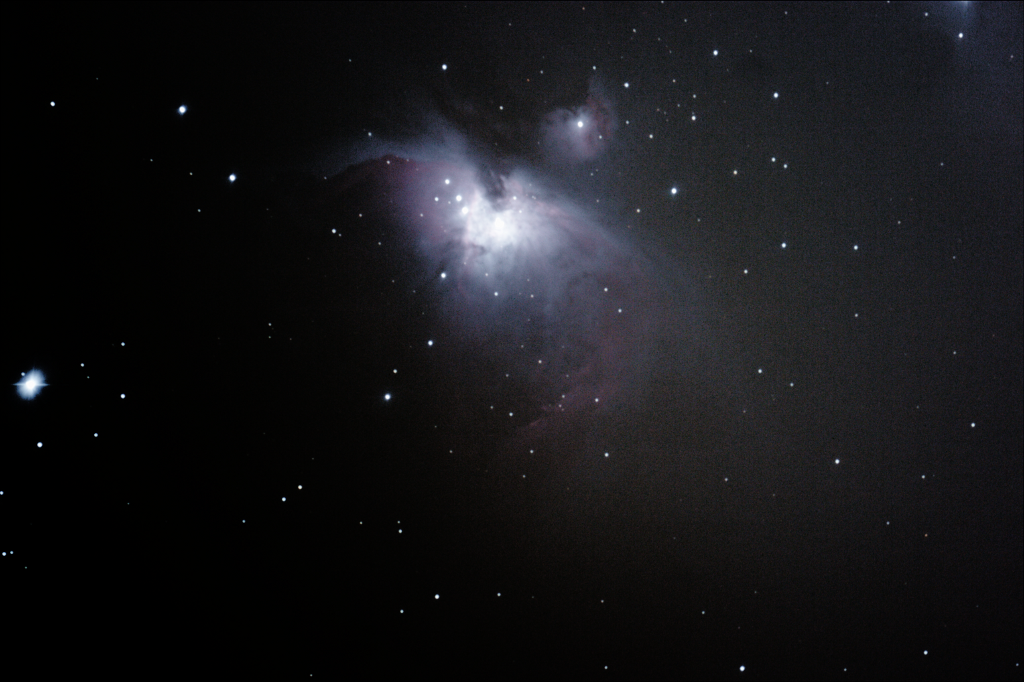
M42 The Great Orion Nebula
The running man can be seen as a smudge at the top right. M42 is the main bulk of gas and dust that forms this nebula. A cluster of bright new stars called the trapezium lights the centre of the nebula but it extends over most of the frame of this image. Longer exposures, clearer skies and more careful focusing would all help expose more detail but it is possible to see some of the fainter areas in this image.
The Great Orion Nebula is visible to the naked eye on a clear night as a blurry “star” in the middle of the sword. Using binoculars allows more detail to be seen but not as much as a long exposure camera will
M43, also called De Mairan’s Nebula, is the small semi-circular nebula at the top of M42. A dark dust cloud lies between the two.

M43 De Mairan’s Nebula
Ooops, either the clouds are rolling in or the scope is pointing at the neighbours roof! Time to go close the roof on the observatory and finish processing the images I did get.
There are more nebulae within the bounds of the Orion constellation but I’ll have to image these another night.
All images are 2 minute exposures stacked to bring out more detail and enhance contrast. The image names will usually be in the format object-NimagesxNsecs-iso800 for example flamenebula-10x120secs-iso800.png is a stack of 10 x 2minute exposures..
Here’s the final image of M42. Only 8 from 14 usable images so not enough to capture this stunning nebula in all its glory.
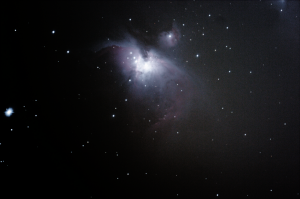
M42, The Great Orion Nebula
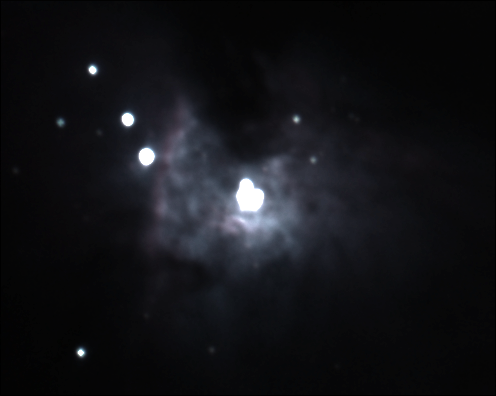
The central trapezium area is made up of numerous stars but 4 prominent, bright stars give it it’s name.

The Trapezium in Orion
You can just make out the blobs of 4 stars in the centre of this image but a 2 minute exposure causes these stars to over-expose and blur together. There are other close-up images of the trapezium taken with different cameras elsewhere on this site.
Something that is very obvious to me during processing is the number of dust-doughnuts as they’re called. These are circular blemishes caused by specs of dust either on the sensor or close to the sensor, such as on a filter or even on the secondary mirror of the scope.
** COMET PANSTARRS IS COMING **
It’s already visible in the southern hemisphere and should be visible from Wales within the next week or so after which it’ll be with us for maybe 3 or 4 weeks.